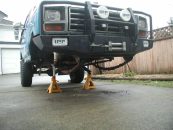
Quick answer: Choose jack stands whose documented rating covers the supported load, whose minimum and maximum heights fit the vehicle’s approved support points, and whose saddles and bases sit securely on those points and the working surface. Confirm whether the label states capacity per stand or per matched pair, inspect the exact model for recalls, and never use stands with missing labels, damaged locks, cracked welds, or bent legs.
Tonnage is only one part of the decision. A stand can have ample capacity and still be unsuitable because it is too tall to fit under the vehicle, too short at the required working height, unstable on the floor, or poorly matched to the support point.
Jack-stand selection worksheet
| Question | What to record | Why it matters |
|---|---|---|
| What load will the stands support? | Vehicle curb/load information and the stand manufacturer’s rating convention | Avoids guessing from vehicle size or marketing names. |
| Where are the support points? | Owner/service-manual diagram for the exact model and year | Determines saddle shape, spacing, and access. |
| What height is needed? | Ground-to-support-point height before lift and desired supported height | Keeps the chosen working position within the stand’s adjustment range. |
| What surface will carry the base? | Concrete, asphalt, or another documented work surface | Base shape cannot compensate for a weak or sloped foundation. |
| How does the stand lock? | Pin, ratchet, secondary lock, and manufacturer instructions | The lock must engage fully and be easy to verify visually. |
1. Understand the capacity label
Read the label and manual for the exact stand. Do not assume every “3-ton” set uses the same rating convention. Some documentation describes a matched-pair capacity, while another product may specify an individual stand. The safe choice is based on the manufacturer’s explicit language and the portion of vehicle weight being supported—not on dividing vehicle weight with an informal formula.
Use stands as a matched pair when supporting one end or one side as directed. Do not mix heights, models, capacities, or locking mechanisms. If the rating label is unreadable, retire the stand until the manufacturer can positively identify it.
2. Match the usable height range
Measure before buying. A low car may not rise high enough for a tall stand to fit at its lowest setting. A truck or SUV may need a taller stand, but using a stand near maximum extension can leave less overlap in the support column and may create an inconvenient working geometry. Stay within the manufacturer’s adjustment positions and never add loose blocks on top of a stand to gain height.
Also verify that your floor jack can raise the approved lift point high enough to insert the stands. Our guide to choosing floor-jack capacity and size covers lift range as well as tonnage.
3. Match the saddle to the support point
A flat axle tube, reinforced frame rail, manufacturer stand point, and pinch weld present different contact shapes. The saddle should center the load without contacting brake lines, wiring, plastic trim, a fuel tank, a battery enclosure, or thin sheet metal. Use a vehicle-specific adapter only when both its maker and the lift/support procedure approve that combination.
First identify the correct locations with the vehicle manual and our guide to finding jacking and support points. A lifting point and a stand point are not automatically interchangeable.
4. Evaluate the base and work surface
A wide, rigid base can improve stability, but every leg must sit flat on a firm, level surface. Reject a stand that rocks unloaded. On asphalt, heat and concentrated leg loads can cause sinking; on soil or gravel, a stand can tilt as the surface shifts. Use a work surface and any base support specifically suited to the load and stand manufacturer’s instructions. Never use stacked bricks, loose lumber, or pavers as an improvised stand.
5. Compare locking mechanisms without shortcuts
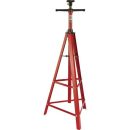
- Pin-style: a solid pin passes through aligned holes. Confirm full insertion and the required retainer.
- Ratchet-style: a pawl engages teeth on the support column. Confirm complete engagement and inspect the teeth and pawl for damage.
- Secondary lock: some ratchet stands add a pin or other backup. It adds a verification step; it does not make damage, overloading, or poor placement acceptable.
No mechanism is safe when partially engaged or altered. Never drill extra holes, weld a repair, substitute a random pin, or use a stand whose column has been bent.
6. Check recalls and model identity
Find the brand, model/item number, capacity, and date or batch information before use. Search the manufacturer’s notices and the NHTSA recall database. This is not theoretical: NHTSA published a consumer advisory covering more than 1.7 million recalled Pittsburgh Automotive jack stands associated with collapse risk. If a stand matches a recall or cannot be positively identified, stop using it until the manufacturer resolves the status.
Inspection checklist
- Rating and model labels are present and readable.
- Base legs sit flat with no twist or separated weld.
- Support column is straight; teeth or pin holes are not rounded, cracked, or distorted.
- Pin, pawl, handle, and secondary lock move freely and engage fully.
- Saddle is not cracked, bent, loose, or contaminated with oil.
- No unauthorized repair, added hole, weld, or substitute part is present.
Safe setup after you choose
- Secure the vehicle and lift only at a manufacturer-approved point.
- Set a matched pair to equal height and place them at approved support points.
- Lower slowly while watching each saddle center under the load.
- Confirm the locks remain fully engaged after loading.
- Perform a cautious stability check from outside the vehicle before going near the underside.
Follow the full floor-jack lifting sequence and our pre-lift safety checklist. For current product categories and feature comparisons, see the jack-stand buying guide.
Sources
- OSHA 29 CFR 1910.244—capacity marking, foundation, immediate support, inspection, and damaged-equipment controls
- NHTSA jack-stand recall consumer advisory
The vehicle and stand manufacturers’ current manuals control the exact rating, placement, and operating procedure.