Quick answer: Use the vehicle’s scissor jack only for the emergency task and lifting points described in that vehicle’s owner manual—usually a tire change. Park on a firm, level area away from traffic, secure the vehicle, loosen the wheel fasteners before lifting, seat the jack squarely at the marked point, raise only enough to change the tire, and never put any part of your body under the vehicle.
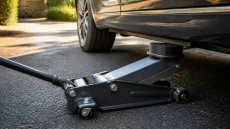
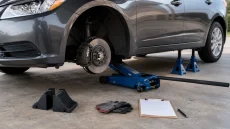
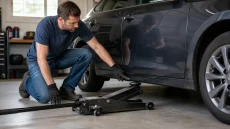
A compact scissor jack is convenient because it fits in the vehicle, not because it is the best tool for every repair. Its small base and saddle demand careful placement. For garage work that requires access underneath, use a suitable floor jack and correctly rated stands instead.
Before starting: stop or continue?
| Condition | Continue | Stop and get help |
|---|---|---|
| Location | Firm, level, well away from moving traffic | Narrow shoulder, slope, soft soil, blind corner, or unstable ground |
| Jack | Correct vehicle jack, intact screw and base, readable label | Bent, rusty through, cracked, incomplete, or wrong for the vehicle |
| Lift point | Exact position shown in the owner manual | Unclear or damaged pinch weld/support area |
| Wheel hardware | Correct wrench/key is available and fasteners can be loosened | Missing locking key, rounded fastener, or unsafe force required |
| Spare | Correct spare with usable inflation and condition | Damaged, flat, incompatible, or restricted beyond the planned drive |
What you need
- The vehicle owner manual and supplied scissor jack.
- Correct lug wrench and any wheel-lock key.
- Wheel chock; a purpose-made chock is preferable to an improvised object.
- Warning triangle or other visibility equipment required or recommended for your location.
- Gloves, a flashlight, and a pressure gauge.
How to use a scissor jack in eight steps
1. Move to the safest available location
Slow down gradually, switch on hazard lights, and move as far from traffic as practical. Choose a firm and level surface. If the only available position leaves you exposed to traffic or the ground cannot support the jack, remain clear of the traffic lane and call roadside assistance.
2. Secure the vehicle
Switch off the engine, apply the parking brake, and place the transmission as the owner manual specifies. Remove passengers to a safe location away from traffic. Chock the wheel diagonally opposite the flat tire when that matches the manufacturer’s procedure.
3. Prepare the spare and tools
Take out the spare, jack, wrench, lock key, and any jack-handle pieces before raising the vehicle. Place the spare flat on the ground where it will not roll. Check the temporary spare’s sidewall instructions and pressure label; compact spares commonly carry speed and distance restrictions that must be followed.
4. Loosen the wheel fasteners while the tire is grounded
Remove the wheel cover if necessary. Break each fastener loose by a small amount without removing it. Doing this while the tire still touches the ground helps prevent the wheel from turning and avoids applying large force to a raised vehicle.
5. Find the exact jacking point
Use the diagram in the owner manual. Many vehicles mark a reinforced pinch-weld location near each wheel, but shapes differ and some require a specific saddle orientation. Never put the jack under the floor pan, battery, rocker trim, exhaust, suspension arm, or another guessed location. See how to identify approved jacking points.
6. Seat the jack and raise slowly
Set the base completely flat and align the saddle exactly as shown. Turn the screw by hand until the saddle contacts the point, then recheck alignment. Continue raising with controlled movements. Watch for base tilt, saddle movement, body deformation, or the vehicle rolling. Stop and reset if anything shifts.
7. Change the wheel without entering the underside
Raise only until the tire clears the ground. Remove the loosened fasteners and wheel, keeping your head and limbs outside the underbody area. Install the spare, thread fasteners by hand, and snug them in the sequence shown by the owner manual. Do not apply final tightening force while the vehicle is high on the scissor jack.
8. Lower and tighten correctly
Lower until the tire contacts the ground and cannot rotate, then tighten the fasteners in the specified star/cross sequence and to the vehicle manufacturer’s torque specification using a torque wrench as soon as possible. Fully lower the vehicle, remove the jack, stow the damaged wheel and tools, and recheck any required torque after the interval stated in the manual.
What not to do
- Do not crawl under a vehicle held only by a scissor jack.
- Do not start or run the engine while the vehicle is raised unless an exact manufacturer procedure explicitly requires it.
- Do not stack rocks, bricks, loose boards, or another jack beneath the base.
- Do not use an impact wrench to guess final wheel torque.
- Do not lift higher than necessary or past the jack’s travel limit.
- Do not use the emergency jack for routine under-vehicle maintenance.
If the jack will not sit squarely
Lower it before the tire leaves the ground. Recheck jack orientation, base condition, and the exact lift-point diagram. If the point is corroded or damaged, the ground is unstable, or the supplied jack does not match the car, do not improvise. Roadside assistance is the safer next step.
After the tire change
Inflate the spare to its specified pressure, obey its speed/distance restrictions, and repair or replace the damaged tire promptly. Clean and dry the jack before returning it to its holder. Inspect the screw threads, base, saddle, crank, and retaining hardware so the kit is complete for the next emergency.
For garage lifting, use our floor-jack procedure and safety checklist. A scissor jack should not substitute for properly selected jack stands.
Sources
- Manufacturer owner-manual example hosted by NHTSA—tire-changing and scissor-jack warnings
- OSHA jack capacity, foundation, travel, support, and inspection principles
Always use the instructions and equipment for the exact vehicle. This general guide cannot identify a model-specific lift point or wheel-torque value.