Quick answer: Jack up the front of a car from a single center point only when the owner or service manual identifies that exact structure as an approved floor-jack point. Secure the rear wheels, center a suitable jack beneath the specified point, raise slowly, place a matched pair of stands at the approved left and right support points, and lower the vehicle onto them. If the manual shows only side points, lift and support one side at a time instead of guessing at a crossmember.
A visible crossmember is not automatically a lifting point. Modern vehicles may have thin stamped structures, aerodynamic covers, steering components, oil pans, exhaust parts, or high-voltage battery enclosures near the centerline. The lift-point diagram for the exact year and model is the deciding source.
First decide whether a front-center lift is approved
| Manual information | Approach |
|---|---|
| A front-center floor-jack point and separate stand points are clearly shown | Use the center point to lift, then transfer the load to the two stand points. |
| Only four side/pinch-weld points are shown | Follow the manufacturer’s side-lifting sequence; do not invent a center point. |
| Air suspension, self-leveling, or EV jack mode is specified | Activate the required mode before lifting and follow all power/charging restrictions. |
| The diagram or point is unclear, covered, corroded, or damaged | Stop and obtain model-specific service information or professional help. |
Use our guide to find the vehicle’s approved jacking points. Confirm that the point is intended for a service jack, not merely for a two-post lift arm or the emergency jack.
Tools and setup
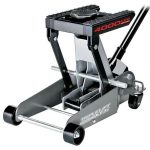
- A floor jack with sufficient rated capacity, low enough entry height, and enough lift range.
- A matched pair of correctly rated jack stands that fit the approved front support points.
- Wheel chocks for both sides of the rear tires.
- The correct saddle pad or adapter if the vehicle or jack manufacturer requires one.
- A firm, clean, level work surface with room for the jack to roll as the lifting arm rises.
If you still need to select equipment, review what size floor jack you need and how to choose jack stands.
Step-by-step front lifting procedure
1. Park and secure the car
Park on a hard, level surface. Switch off the engine, remove occupants, set the parking brake, and put the transmission in the state required by the manual. Chock the front and rear of both rear tires so the car cannot roll in either direction.
2. Prepare vehicle-specific systems
Check for an air-suspension, self-leveling, transport, service, or jack mode. Follow the vehicle instructions before lifting. Some EVs also specify lift pads, battery-clearance zones, ride-height settings, and charging-cable restrictions. Never place the saddle or stands under a traction battery or side rail unless the manufacturer explicitly designates the point.
3. Inspect the jack and stands
Confirm readable ratings and inspect for leaks, bent parts, cracked welds, damaged wheels, missing hardware, or abnormal operation. Test the jack’s rise and controlled release without a load. Remove defective equipment from service.
4. Identify both the lift point and stand points
Locate all three positions before rolling the jack under the car. The jack must not block access to the two support points. Clear only removable covers the manual tells you to remove; do not rest a saddle on plastic shielding.
5. Center the floor jack
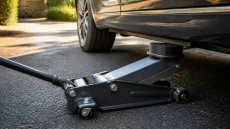
Position the saddle squarely beneath the designated front-center point. Check from more than one angle. A long, low-profile jack may be needed to reach the point while keeping the handle operable. Do not extend reach with a loose block or allow the saddle to touch an adjacent component.
6. Raise slowly
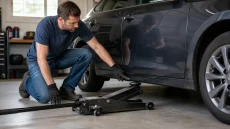
Close the release valve as the jack manual directs and pump smoothly. Pause when the saddle takes weight. Confirm the point is not deforming and the jack wheels remain free to roll slightly as the arm travels. Watch both front corners; stop if the car twists, shifts on the chocks, or lifts unevenly.
7. Place and load both stands
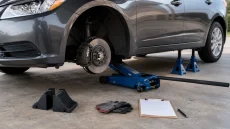
Raise only high enough to insert the matched stands at the approved left and right points. Set them to equal height and fully engage their locks. Lower gradually until both stands carry the load evenly. The jack may remain near the lift point as a non-load-bearing backup if its manual permits, but the stands must be the primary support.
8. Verify before work
Inspect every contact point from outside the car. Give the vehicle a cautious push at a strong exterior area. Any rocking, settling, saddle movement, stand tilt, or unusual sound means the car must be raised and reset. Never enter the underside until the support is stable.
How to lower the front
- Remove tools, drain pans, and people from under and around the car.
- Return the jack to the approved center point and raise only enough to unload both stands.
- Remove the stands and keep hands and feet out of pinch zones.
- Open the release valve slowly and watch the car settle evenly onto both front tires.
- Remove the jack and chocks, then reset any vehicle mode as the manual directs.
Common front-lift mistakes
- Using the engine oil pan, transmission case, radiator support, or an unverified crossmember.
- Discovering after lifting that the jack blocks the only approved stand positions.
- Failing to chock both directions at the rear tires.
- Using a short jack at an improvised extension to reach a deep center point.
- Assuming a lift-arm point, pinch weld, and center service-jack point are interchangeable.
- Working beneath the vehicle before it is fully supported and stability checked.
For the complete general sequence, read how to use a floor jack safely and keep the floor-jack safety checklist nearby.
Sources
- OSHA 29 CFR 1910.244—capacity, foundation, immediate support, travel limits, and inspection
- Current manufacturer owner-manual example hosted by NHTSA—model-specific lift points, jack mode, stands, and controlled lowering
Always follow the owner/service manual for the exact vehicle. A generic guide cannot approve a center lifting point.